Description
The US-100 Ultrasonic Distance Sensor Module operates from a wide voltage range and provides both digital and serial data output modes.
The US-100 features accurate temperature corrected range detection. It can output the distance in millimeters using a serial data output mode. Alternatively, the distance can be calculated by measuring the amount of time that a digital output is held high.
This sensor can be used with both 3.3V and 5V microcontrollers and only consumes 2mA when idle.
Using the US-100 Ultrasonic Distance Sensor Module :-
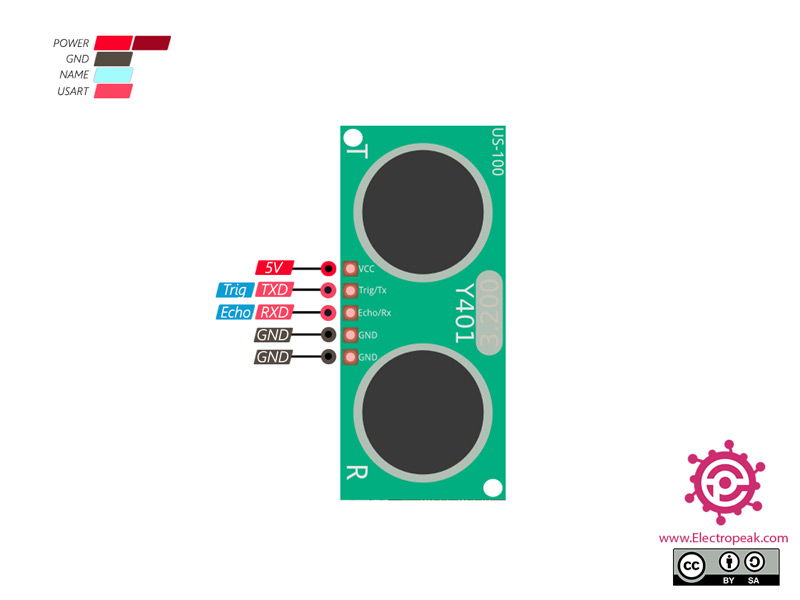
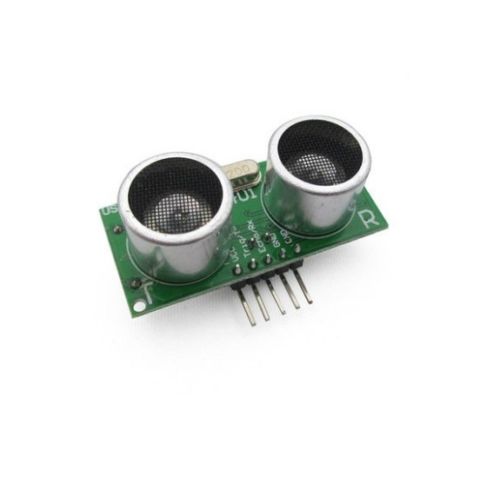
Connect the VCC and GND pins to a 2.4V-5.5V power supply. The usage of the other pins depends on the operating mode selected. Select the operating mode of the US-100 Ultrasonic Distance Sensor by using the jumper on the back of the module. When the jumper is present, the sensor outputs the distance as binary serial data, otherwise, the sensor outputs a single pulse that has a width that represents the distance measured.
Using the US-100 Distance Sensor in Serial Data Mode:-
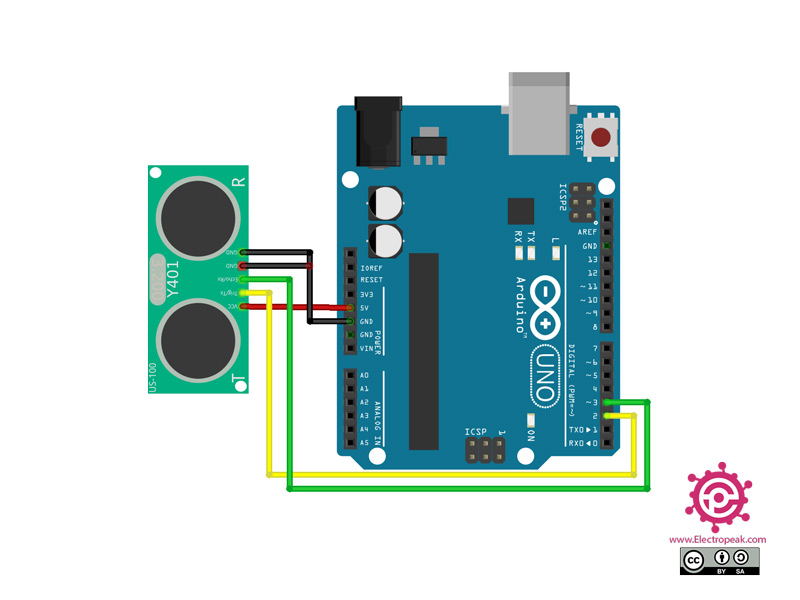
Place the shunt on the operating mode selection jumper to choose serial data mode. Attach the module to a serial port on your microcontroller/Arduino.. The Trig/TX pin connects to your microcontrollers TX serial transmit line. The Echo/RX pin connects to your microcontrollers RX serial receive line. Set the microcontrollers serial port to use 9600 baud at 8-N-1 (eight data bits, no parity, one stop bit).
To start measuring the distance, output a 0x55 over the serial port and read back the two-byte distance in a high byte, low byte format. The distance returned is measured in millimeters. Use the following formula to obtain the distance as millimeters:
- Millimeters = FirstByteRead * 256 + SecondByteRead
This module can also output the temperature when using a serial output mode. To read the temperature, output a 0x50 byte over the serial port and read back a single temperature byte. The actual temperature is obtained by using the following formula:
- Celsius = ByteRead 45
Using the US-100 Sensor in Pulse Width Mode:-
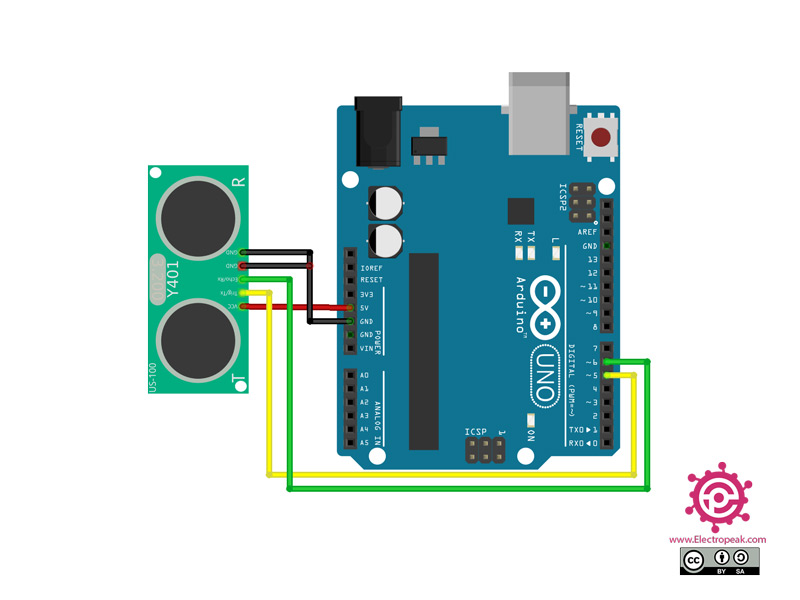
Select the pulse mode by removing the shunt from the operating mode selection jumper. Connect the Trig/TX pin to a digital output on your microcontroller and the Echo/RX pin to a digital input.
To obtain a distance measurement, set the Trig/TX pin high for at least 50 microseconds then set it low to trigger the measurement. The module will output a high pulse on the Echo/RX line with a width that corresponds to the distance measured. Use your microcontroller/Arduino to measure the pulse width using microseconds. Use the following formula to calculate the distance:
- Millimeters = PulseWidth * 34 / 100 / 2
Features:
- It features temperature compensation.
- It has high precision up to 1 mm
- Provides two output modeslevel or UART.
- Detecting distance is from 2 cm to 450 cm
- TTL Trigger input
- TTL Echo output
Package includes:
1 x US-100 Ultrasonic Distance Sensor Module
Additional information
|
Operating Voltage (VDC) |
2.4 to 5 |
|
Frequency(Hz) |
40000 |
|
Average Current Consumption (mA) |
2 |
|
Max. Sensing Distance (cm) |
450 |
|
Sensing Angle |
15 |
|
Sensor Cover Dia. (mm) |
16 |
|
PCB Size ( L x W ) mm |
45 x 20 |
|
Weight (gm) |
9 |
|
Working Temperature(C) |
20 to 70 |