


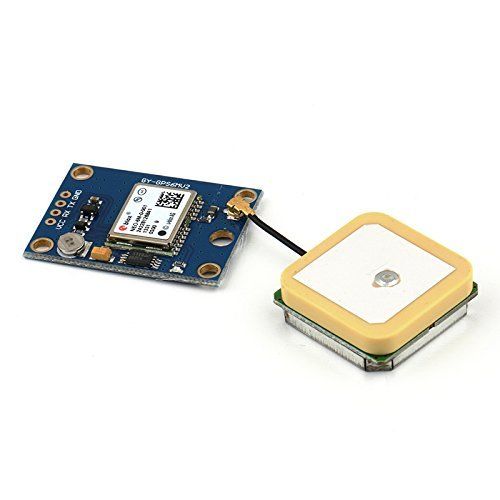
Description
Give your next Arduino project the ability to sense locations with the NEO-6M GPS module that can track 22 satellites and identify locations anywhere in the world. It can serve as a great launch pad for anyone looking to get into the world of GPS.
They are low power (suitable for battery operated devices), affordable, easy to interface and extremely popular with hobbyists.
Hardware Overview
NEO-6M GPS Chip
At the heart of the module is a GPS chip from U-blox – NEO-6M. The chip measures less than a postage stamp but packs a surprising amount of features into its tiny frame.

It can track up to 22 satellites over 50 channels and achieve the industry’s highest level of tracking sensitivity i.e. -161 dB, while consuming only 45 mA current.
Unlike other GPS modules, it can perform 5 location updates in a second with 2.5m horizontal position accuracy. The U-blox 6 positioning engine also has a Time-To-First-Fix (TTFF) of less than 1 second.
One of the best features offered by the chip is Power Save Mode (PSM). This allows a reduction in system power consumption by selectively switching certain parts of the receiver on and off. This dramatically reduces the power consumption of the module to just 11mA making it suitable for power sensitive applications such as GPS wristwatches.
The required data pins of the NEO-6M GPS chip are broken out to a 0.1″ pitch headers. It contains the pins needed for communication with the microcontroller over the UART. The module supports baud rates from 4800bps to 230400bps with a default baud of 9600.
Specifications
| Receiver Type | 50 channels, GPS L1(1575.42Mhz) |
| Horizontal Position Accuracy | 2.5m |
| Navigation Update Rate | 1HZ (5Hz maximum) |
| Capture Time | Cool start: 27sHot start: 1s |
| Navigation Sensitivity | -161dBm |
| Communication Protocol | NMEA, UBX Binary, RTCM |
| Serial Baud Rate | 4800-230400 (default 9600) |
| Operating Temperature | -40°C ~ 85°C |
| Operating Voltage | 2.7V ~ 3.6V |
| Operating Current | 45mA |
| TXD/RXD Impedance | 510Ω |
Position Fix LED Indicator
There is an LED on the NEO-6M GPS module that indicates the status of the ‘Position Fix’. It will blink at different rates depending on which state it is in:
- No blinking – it is searching for satellites.
- Blink every 1s – Position Fix is found (the module can see enough satellites).

3.3V LDO Regulator
The operating voltage of the NEO-6M chip ranges from 2.7 to 3.6V. But the good news is, this module comes with MICREL’s MIC5205 Ultra-Low Dropout 3V3 regulator.
The logic pins are also 5-volt tolerant, so we can easily connect it to Arduino or any 5V logic microcontroller without using a logic level converter.

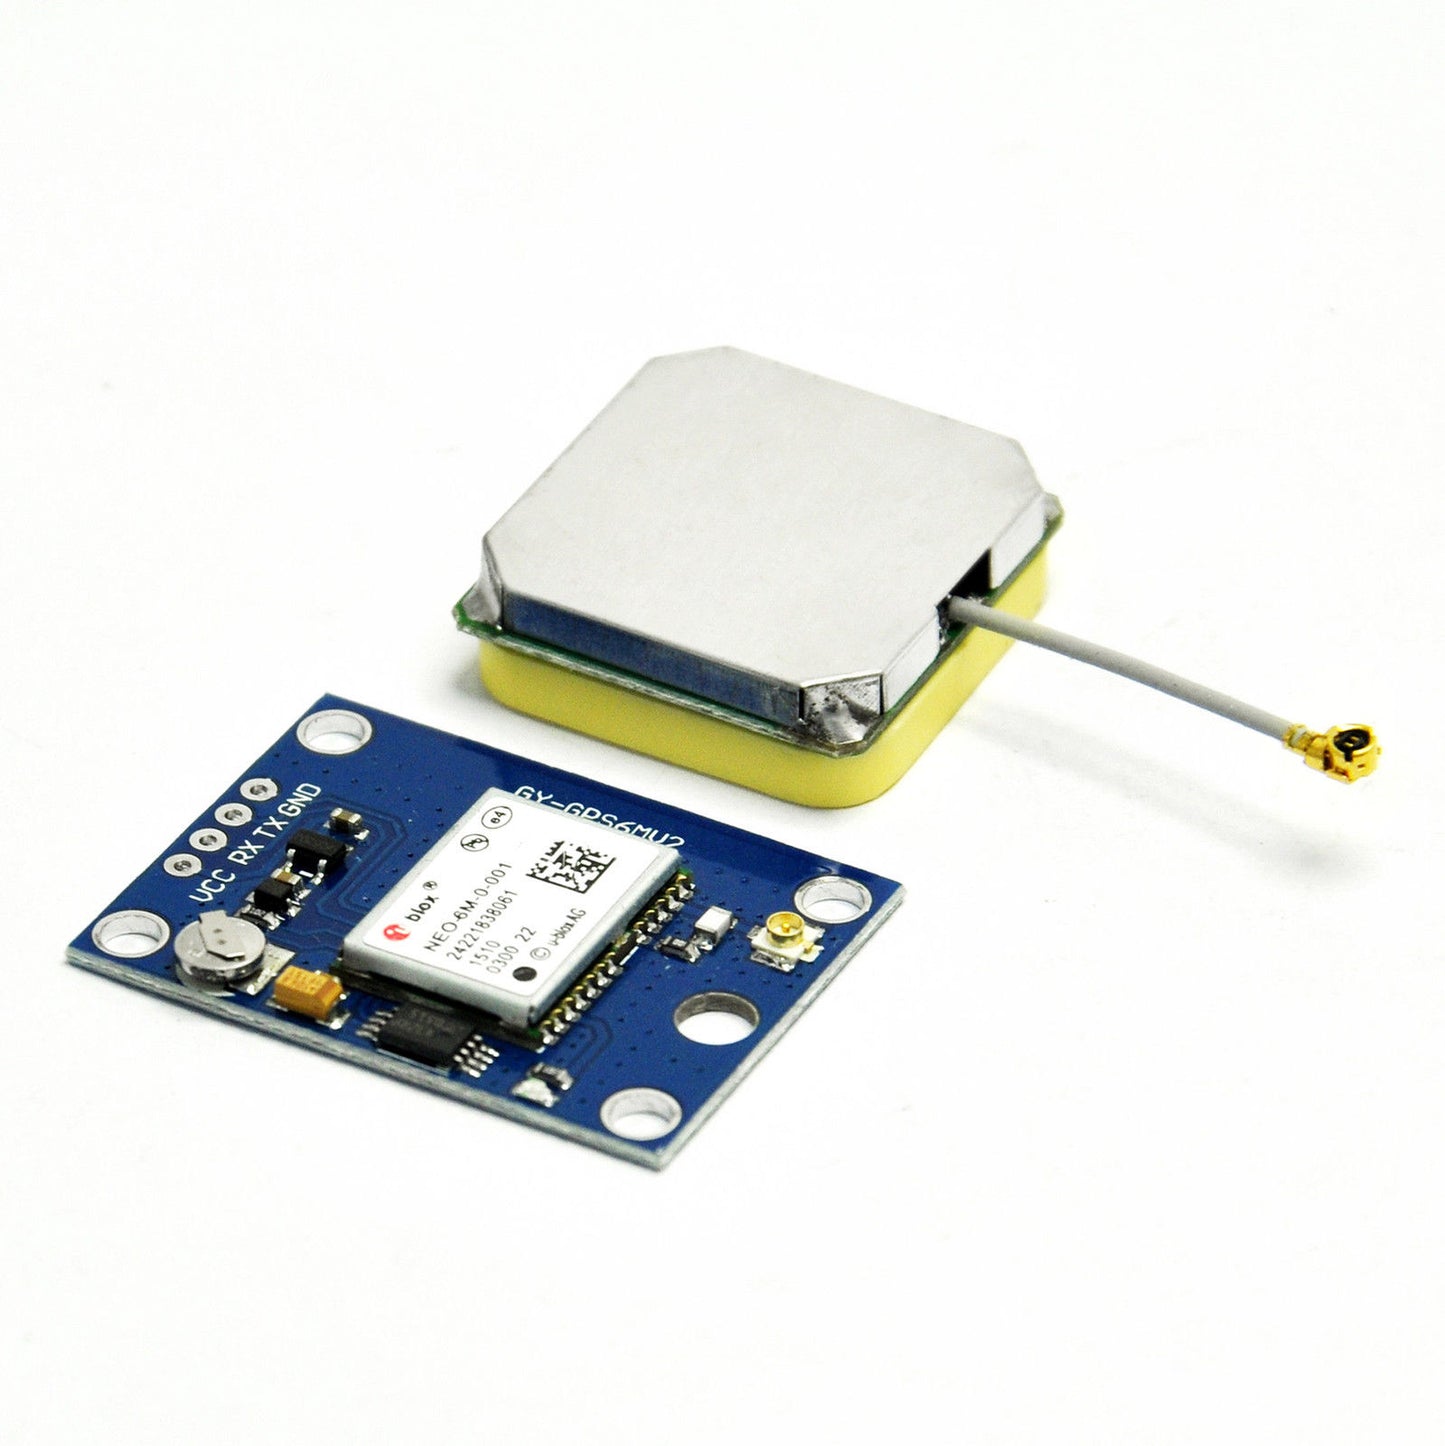
Battery & EEPROM
The module is equipped with HK24C32 Two Wire Serial EEPROM. It is 4KB in size and is connected via I2C to the NEO-6M chip.
The module also houses a rechargeable button battery that acts as a super-capacitor.

EEPROM and battery together help in retaining the BBR (Battery Backed RAM). BBR contains clock data, latest position data (GNSS orbit data) and module configuration. But it is not for permanent data storage.
The battery charges automatically when power is supplied to the module and retains data for two weeks without power.
Since the battery retains the clock and last position data, Time-To-First-Fix (TTFF) is significantly reduced to 1s. This allows much faster position locks. Without battery the GPS is always cold-started and takes longer for the initial GPS lock.
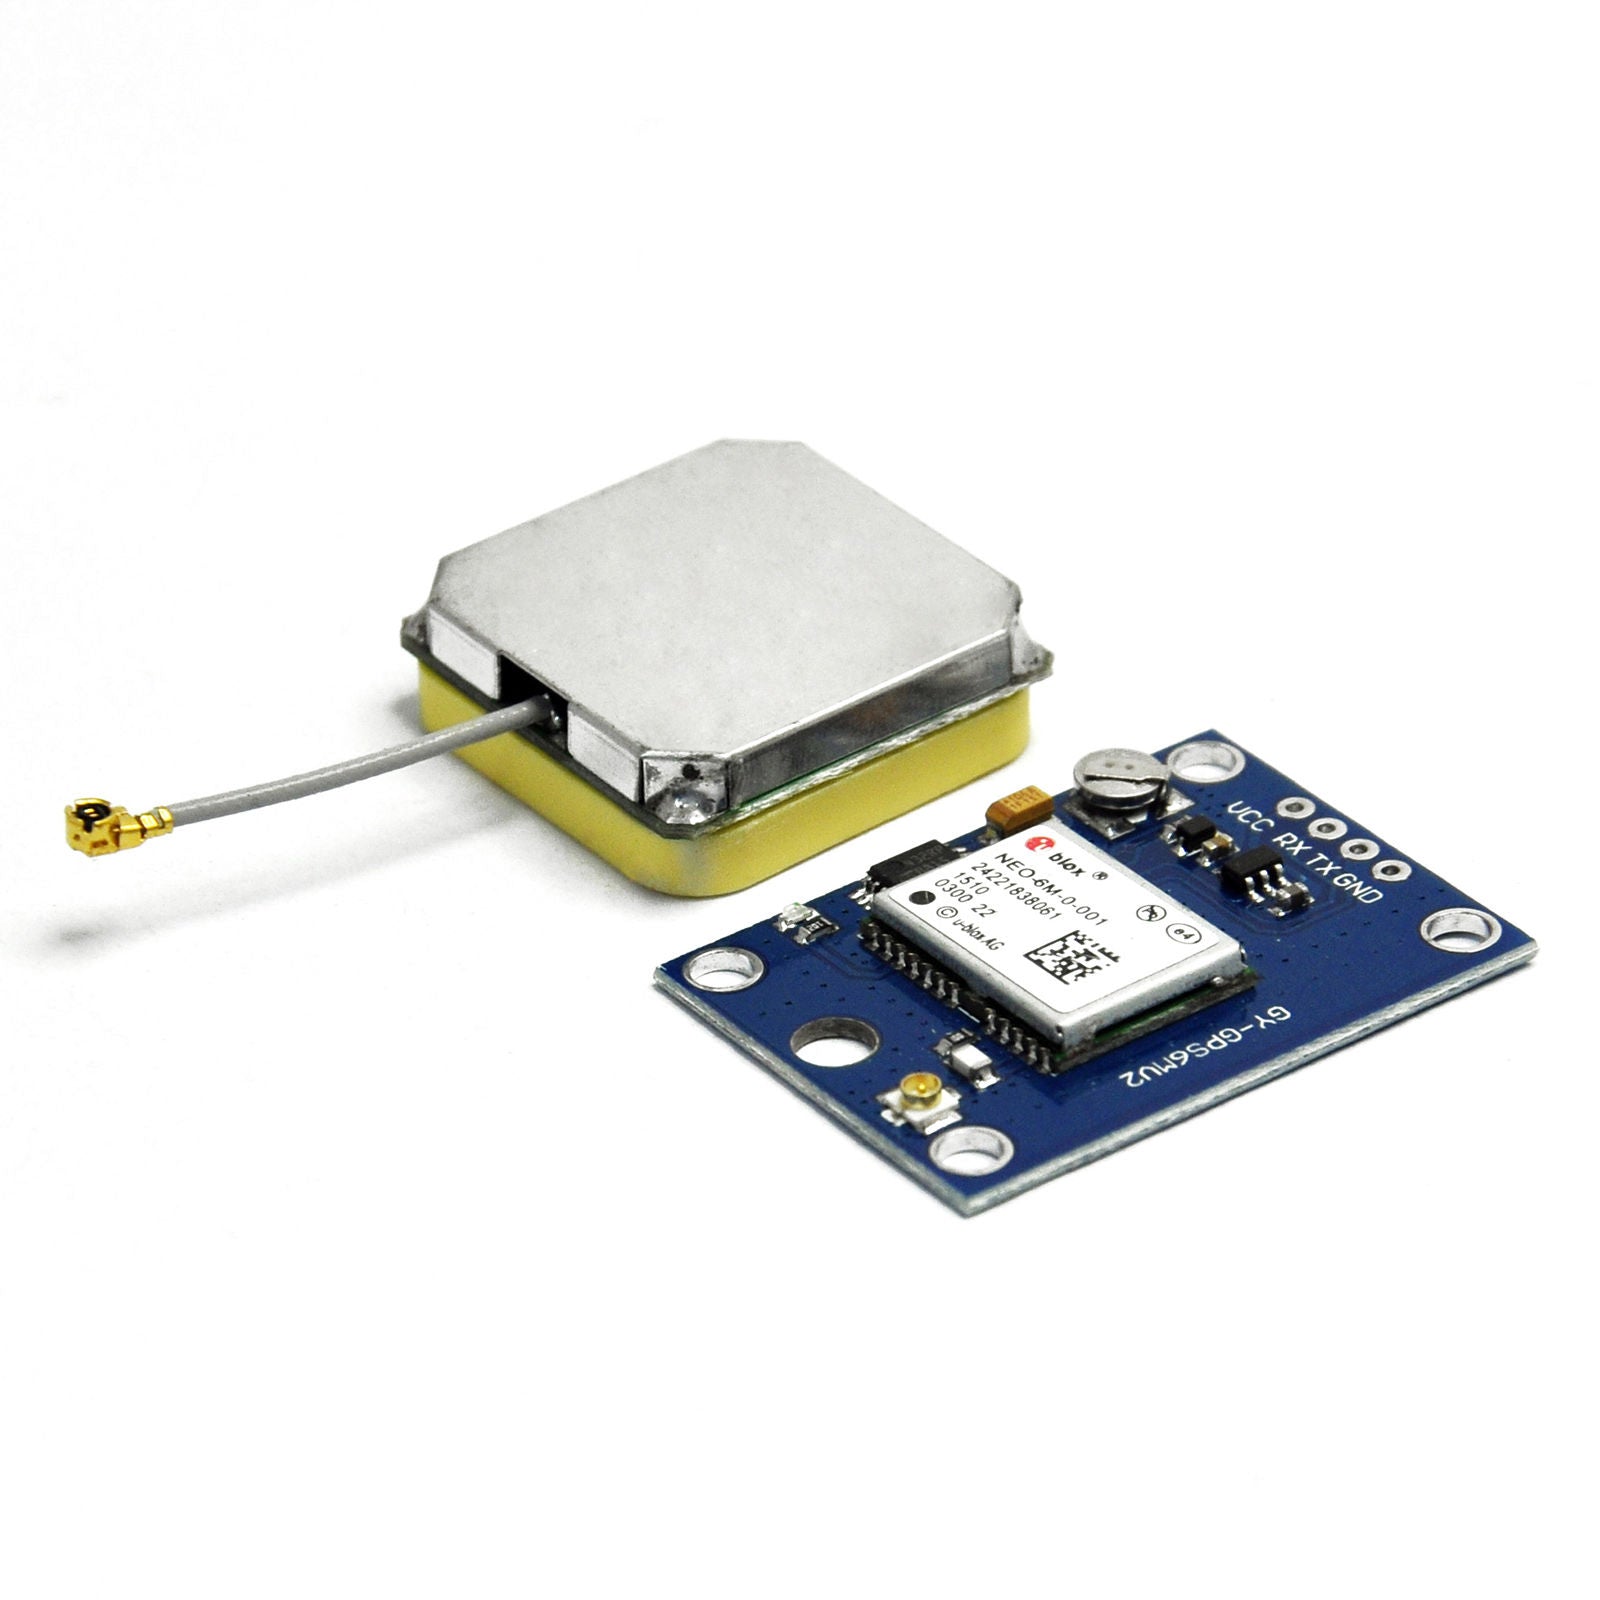
Antenna
The module comes with -161 dBm sensitivity patch antenna for receiving radio signals from GPS satellites.

You can snap-fit this antenna into the small U.FL connector located on the module.

The patch antenna is great for most of our projects. But if you want to get more sensitivity and accuracy, you can also snap-on any 3V active GPS antenna.
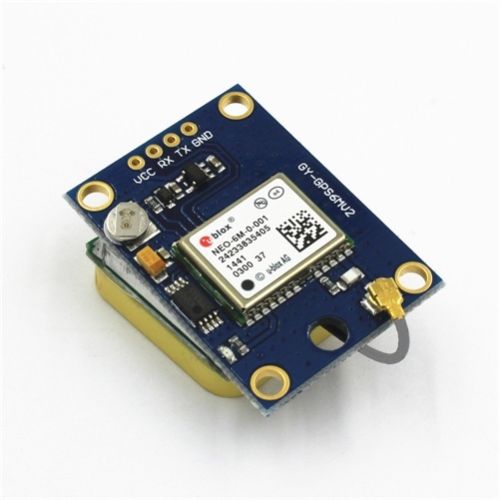
NEO-6M GPS Module Pinout
The NEO-6M GPS module has a total of 4 pins that connect it to the outside world. The connections are as follows:

GND is the ground pin and needs to be connected to the GND pin on the Arduino.
TxD (Transmitter) pin is used for serial communication.
RxD (Receiver) pin is used for serial communication.
VCC supplies power to the module. You can connect it directly to the 5V pin on the Arduino.
Wiring a NEO-6M GPS Module to an Arduino
Now that we know everything about the module, we can start connecting it to our Arduino.
Begin by connecting the patch antenna to the U.FL connector. You can thread the U.FL cable through one of the mounting holes.
The module usually comes with unsoldered header pins. So you will need to solder them first.
Next, connect the VCC pin to the 5V pin on the arduino and GND to ground.
Finally connect the Tx and Rx pins on the module to digital pins #2 and #3 respectively.

Once you have connected everything you are ready to go!
Arduino Code – Reading GPS Data
The best thing about the NEO-6M GPS receiver is that it starts spitting out data as soon as you turn it on. The following sketch simply reads this data and writes to the serial monitor
#include <SoftwareSerial.h>

// Choose two Arduino pins to use for software serial
int RXPin = 2;
int TXPin = 3;

//Default baud of NEO-6M is 9600
int GPSBaud = 9600;

// Create a software serial port called "gpsSerial"
SoftwareSerial gpsSerial(RXPin, TXPin);

void setup()
{
  // Start the Arduino hardware serial port at 9600 baud
  Serial.begin(9600);

  // Start the software serial port at the GPS's default baud
  gpsSerial.begin(GPSBaud);
}

void loop()
{
  // Displays information when new sentence is available.
  while (gpsSerial.available() > 0)
    Serial.write(gpsSerial.read());
}
Upload the program and open the Serial Monitor from the Arduino IDE. Remember to select 9600 baud. You should see text like the following:
