Description
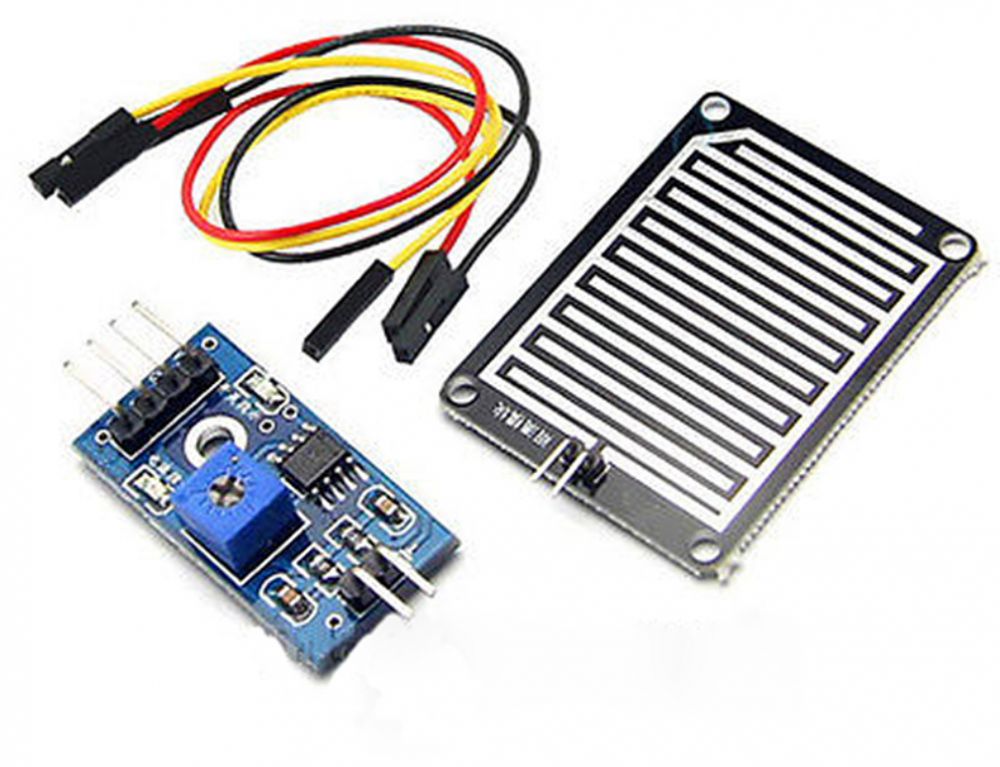
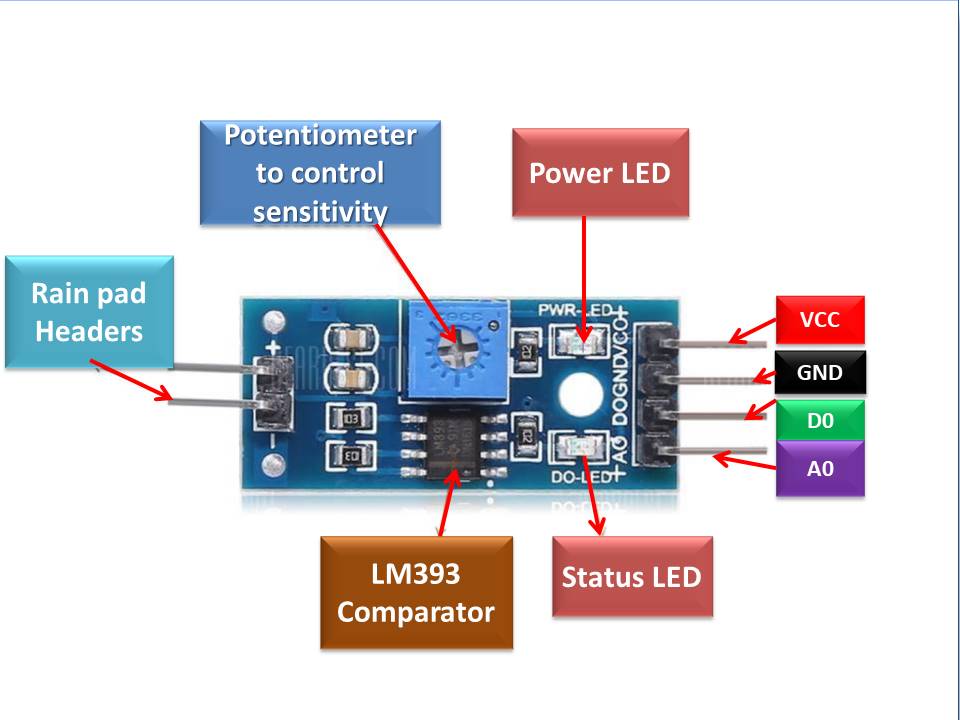
A rain sensor module is a simple tool for detecting rain. It can be used as a switch when a raindrop falls through the raining board, as well as to measure the intensity of the rain. The module includes a rain board and a separate control board for convenience, a power indicator LED, and adjustable sensitivity via a potentiometer.
Package Includes:
- 1 x Water Raindrops Detection Sensor 3.3-5v Double Sided
- 1 x Amplifier Module
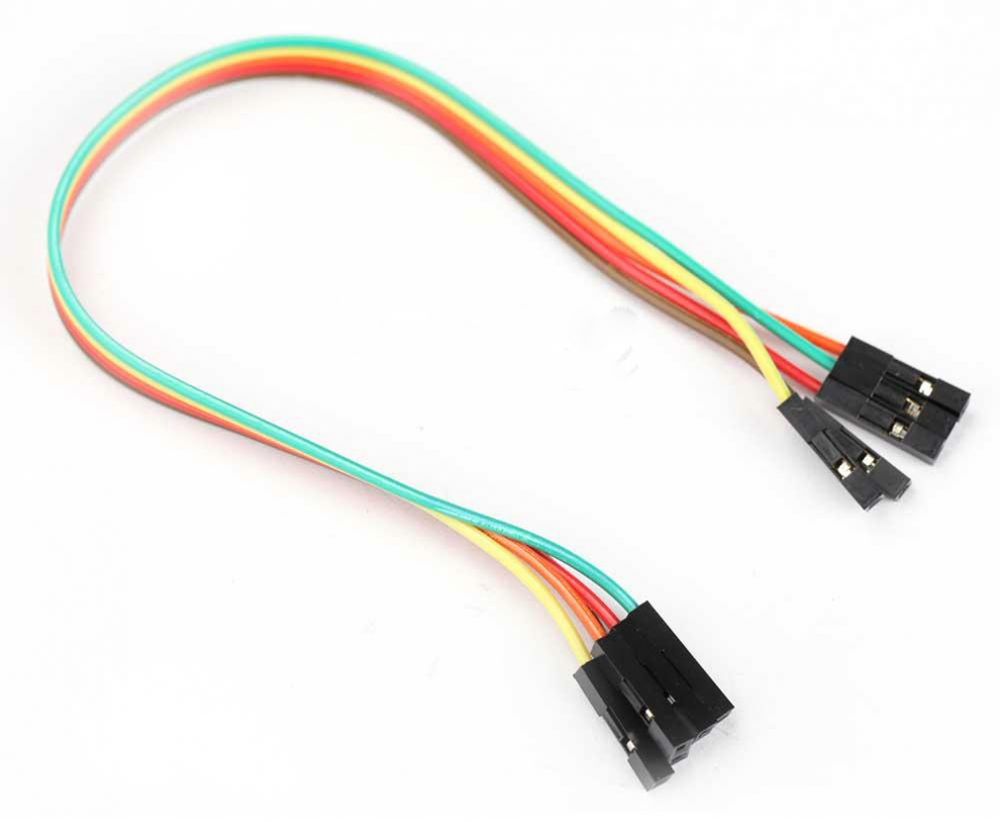
- 2 x Dupont Female to Female Wire
Features:
- It is capable of monitoring various weather conditions and converting them into a digital signal and AO output.
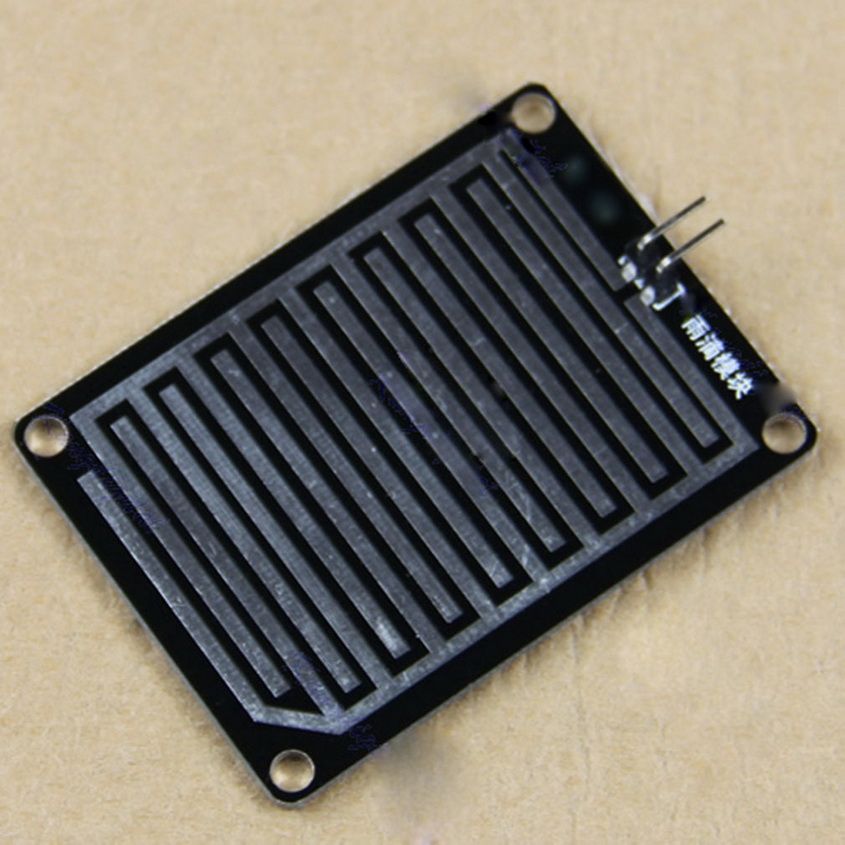
- The surface of the sensor is treated with high-quality FR-04 double-sided material, a super large area of 5.0*4.0CM, and nickel plating.
- It outperforms in anti-oxidation, conductivity, and service life.
- The comparator output has a clean signal, a good waveform, and a high driving capability (greater than 15mA)
- The potentiometer's sensitivity is adjusted.
- Digital switch output (0 and 1) and analog AO voltage output are the two output formats.
- For simple installation, a fixed bolt-hole is provided.
Description:
The raindrop sensor module is an intelligent and low-cost rain sensor. It consists of two parts: a rain-sensing pad and a control board. The sensitive sensing pad detects any water present on it, while the control board reads and binaries these signals. The raindrop module is widely used in the automotive industry. When rain is detected, it can be used to monitor the weather and send closure requests to shutters or windows.
Principle of Work:
When there isn't any rain, the resistance of the raining board is high, and when raindrops are on the circuit board, it is low. It works on the same principles as a photoresistor.
The analog output of the Rain Detection Sensor varies when water droplets fall on top of it. When water droplets start falling from the top, the voltage progressively declines from VCC to 0V. You can also see that the trigger LED on the board comes on when a particular threshold is achieved, which can be chosen by the potentiometer. We didn't make a visual representation of how the digital part of the circuit works for the sake of simplicity, but it's pretty simple: when a certain threshold is reached (that we can set with a potentiometer), the output of the rain detection sensor module goes low, which lights up the onboard trigger LED. The differences between all of the various states for the raining board:
Without rain, the two copper tracks are not connected, and there is infinite resistance. Light rain causes a few water drops to fall on the rain board's surface, connecting the two conductor tracks. Due to the fact that water is conductive, the rain board's resistance decreases, resulting in a medium resistance. The same thing occurred when I touched the rain sensor because both copper tracks were connected by the conductivity of my skin. When it rains heavily, the resistance decreases as more raindrops fall on the circuit board, eventually reaching zero and shorting the circuit.
Pinout of the Module:
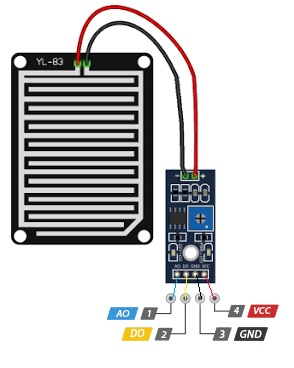
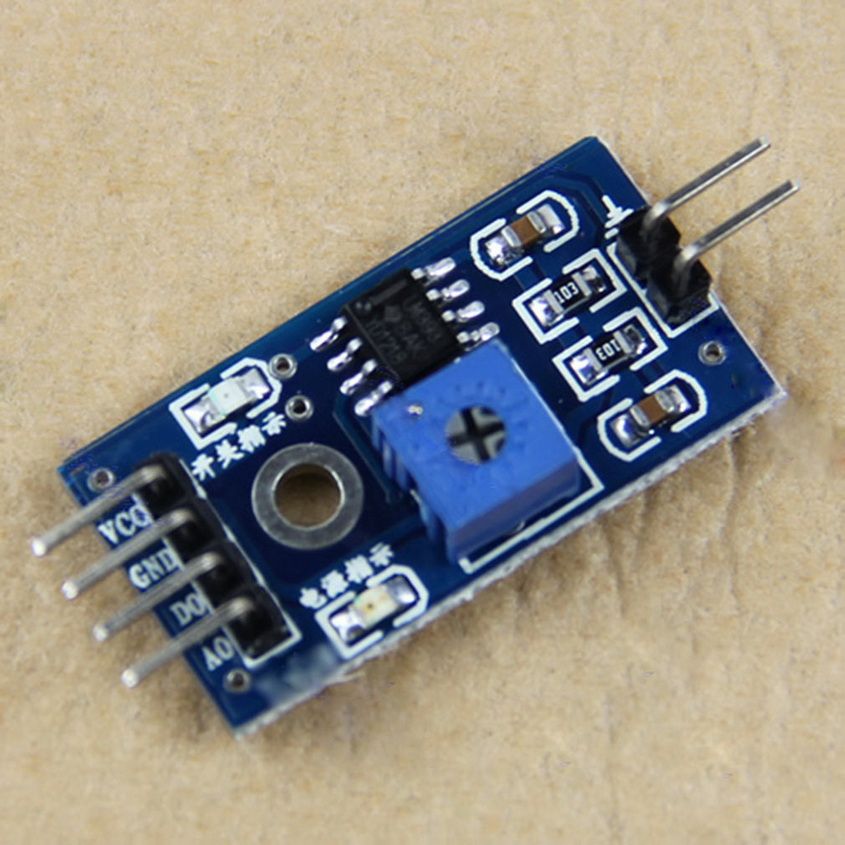
The AO (Analog Output) pin outputs an analog signal ranging from 5V to 0V.
DO (Digital Output) pin provides the internal comparator circuit's digital output. It can be connected to any digital pin on an Arduino or to a 5V relay or similar device directly.
GND stands for ground.
The sensor is powered by the VCC pin. It is recommended that the sensor be powered from 3.3V to 5V. Please keep in mind that the analog output will vary depending on the voltage supplied to the sensor.
Applications:
- Rain Detector using Arduino
- Arduino Weather Station
- IoT Weather Monitoring System
Circuit:
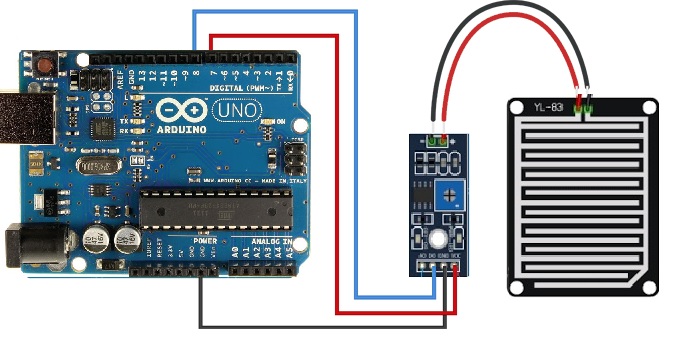
The module's Ground and VCC pins must be connected to the Arduino Board's Ground and Pint 7, respectively, and the D0 pins to pin 8 on the Arduino Board.
Note: One well-known problem with these senors is their short lifespan when exposed to moisture. Constantly applying power to the sensing pad accelerates corrosion significantly. To avoid this, we recommend that you do not power the sensor continuously, but only when taking readings. Connecting the VCC pin to a digital pin of an Arduino and setting it to HIGH or LOW as needed is a simple way to accomplish this.
Library:
no library is needed.
Code:
Once the sketch has been uploaded, open a Serial Monitor window to view the Arduino's output. When the weather is clear, you should see a digital output of HIGH. Sprinkle some water on the sensing pad to see if it detects water.
#define sensorPower 7
#define sensorPin 8

void setup() {
  pinMode(sensorPower, OUTPUT);

  // Initially keep the sensor OFF
  digitalWrite(sensorPower, LOW);

  Serial.begin(9600);
}

void loop() {
  //get the reading from the function below and print it
  int val = readSensor();
  Serial.print("Digital Output: ");
  Serial.println(val);

  // Determine status of rain
  if (val) {
    Serial.println("Status: Clear");
  } else {
    Serial.println("Status: It's raining");
  }

  delay(1000);  // Take a reading every second
  Serial.println();
}

//  This function returns the sensor output
int readSensor() {
  digitalWrite(sensorPower, HIGH);  // Turn the sensor ON
  delay(10);              // Allow power to settle
  int val = digitalRead(sensorPin); // Read the sensor output
  digitalWrite(sensorPower, LOW);   // Turn the sensor OFF
  return val;             // Return the value
}
Technical Details:
- Working voltage 5V.
- Small board PCB size: 3.2cm x 1.4cm.
- Area: 5cm x 4cm nickel plate on the side.
Resources:
Comparisons:
The sensing area of this Module is enough for modest applications, and mounting holes are available on both the sensing plate and the main PCB. However, it is the same as the Soil Moisture Sensor. That is the PCB reliability of the sensing Plate or PCB. You should consider if you use this sensor in situations where the plate is exposed to moisture for an extended period of time. and because the analog value produced by the sensor is rarely used. In most circumstances, analog values are useless since, as soon as water falls on the plates, the Digital output is high, leaving no room for analog values, this version of the rain sensor has a sensing circuit on both sides which gives you the possibility to fix sensing plate and multiple ways and still we have another version with only one side which give less more possibilities.


