

Description
The MLX90614 ESF is an Infra-Red thermometer for non-contact temperature measurements. Both the IR sensitive thermopile detector chip and the signal conditioning ASIC are integrated into the same TO-39 can. The Integrated MLX90614 GY-906 is a low noise amplifier, 17-bit ADC, and powerful DSP unit thus achieving high accuracy and resolution of the thermometer.
The user can configure the digital output to be PWM. As a standard, the 10-bit PWM is configured to continuously transmit the measured temperature in the range of -20 to 120 °C, with an output resolution of 0.14 °C.
Features:
- Works from 3.3V to 5V input, Module has power regulator IC built-in.
- Standard I2C interface with built 2x pull up resistors
- When measuring the temperature, please maintain a measuring distance of 1 cm
- Small size, low cost
- Easy to integrate
- Factory calibrated in a wide temperature range: -40 to 125 °C for sensor temperature and -70 to 380 °C for object temperature.
- High accuracy of 0.5°C over the wide temperature range (0..+50 C for both Ta and To)
- Medical accuracy of 0.1°C in a limited temperature range available on request
- The measurement resolution of 0.01°C
- SMBus compatible digital interface for fast temperature readings and building sensor networks
- Customizable PWM output for continuous reading
- Simple adaptation for 8 to 16V applications
Package Includes:
1 x GY-906 MLX90614 Contactless IR Temperature Sensor Module
Application:
- High precision non-contact temperature measurements
- Thermal Comfort sensor for Mobile Air Conditioning control system
- The temperature sensing element for residential, commercial and industrial building air conditioning Windshield defogging
- The automotive blind angle detection
- Industrial temperature control of moving parts
- Temperature control in printers and copiers
- Home appliances with temperature control
- Healthcare
- Livestock monitoring
- Movement detection
- Multiple zone temperature control – up to 127 sensors can be read via common 2 wires
- Thermal relay/alert
- Body temperature measurement
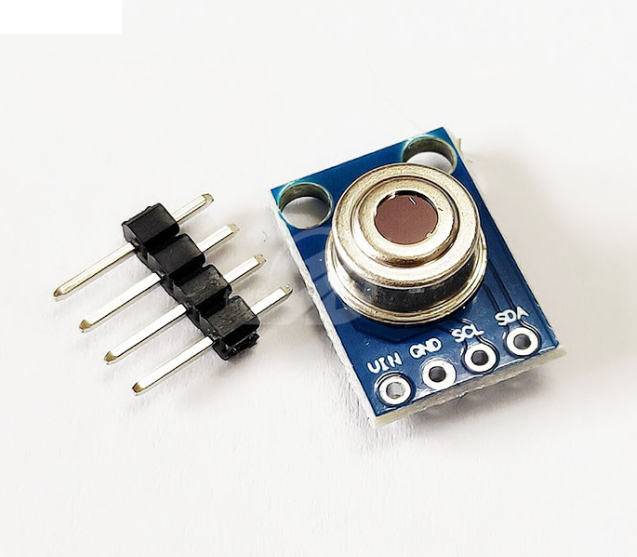
Pinout
The MLX90614 module brings out the following connections:

VCC is the power pin. You can connect it to 3.3V or 5V output from your Arduino.
GND is the ground.
SCL is the I2C clock pin, connect to your Arduino’s I2C clock line.
SDA is the I2C data pin, connect to your Arduino’s I2C data line.
Wiring up a MLX90614 Module to an Arduino
Now that we know everything about the module, we can begin hooking it up to our Arduino!
Start by connecting the VCC pin to the power supply, 5V is fine. Use the same voltage that your microcontroller logic is based off of. For most Arduinos, that is 5V. For 3.3V logic devices, use 3.3V. Now connect GND to common ground.
Connect the SCL pin to the I2C clock pin and the SDA pin to the I2C data pin on your Arduino. Note that each Arduino Board has different I2C pins which should be connected accordingly. On the Arduino boards with the R3 layout, the SDA (data line) and SCL (clock line) are on the pin headers close to the AREF pin. They are also known as A5 (SCL) and A4 (SDA).
The following illustration shows the wiring.

Library Installation
There are several libraries available for the MLX90614 sensor. However in our example, we are using the Adafruit library which is very easy to use, but it only supports basic temperature measurement and not the advance features of the sensor. The library can be downloaded from within the Arduino IDE Library Manager.
To install the library navigate to the Sketch > Include Library > Manage Libraries… Wait for Library Manager to download libraries index and update list of installed libraries.
Filter your search by typing ‘adafruit mlx90614‘. Click on the entry, and then select Install.
Arduino Code
Below is a basic Arduino sketch that allows you to quickly test the functionality of the MLX90614. Go ahead and upload it to your Arduino. You should see the ambient and object temperature printed on the serial interface.
#include <Adafruit_MLX90614.h>
Adafruit_MLX90614 mlx = Adafruit_MLX90614();

void setup() {
	Serial.begin(9600);
	while (!Serial);

	if (!mlx.begin()) {
		Serial.println("Error connecting to MLX sensor. Check wiring.");
		while (1);
	};
}

void loop() {
	Serial.print("Ambient = "); Serial.print(mlx.readAmbientTempC());
	Serial.print("*C\tObject = "); Serial.print(mlx.readObjectTempC()); Serial.println("*C");
	Serial.print("Ambient = "); Serial.print(mlx.readAmbientTempF());
	Serial.print("*F\tObject = "); Serial.print(mlx.readObjectTempF()); Serial.println("*F");

	Serial.println();
	delay(500);
}
Once the sketch is uploaded, open your serial monitor, setting the baud rate to 9600 bps. You should see both the ambient temperature and the object temperature begin to stream by.
Try pointing the sensor at objects lying around you or pointing it at your forehead to make sure you don’t have a fever!
Code Explanation:
The sketch starts with including the Adafruit_MLX90614 library. In that same global area, an Adafruit_MLX90614 object called mlx is defined.
#include <Adafruit_MLX90614.h>

Adafruit_MLX90614 mlx = Adafruit_MLX90614();
In the setup, we initialize the serial communication with PC and call the begin() function.
The begin() function initializes I2C interface. This function optionally takes a parameter (the 7-bit address of your sensor) but if left empty it assumes the address is set to the default (0x5A).
oid setup() {
	Serial.begin(9600);
	while (!Serial);

	if (!mlx.begin()) {
		Serial.println("Error connecting to MLX sensor. Check wiring.");
		while (1);
	};
}
In the loop, we simply print the current ambient and object temperatures using the readAmbientTempC()/mlx.readAmbientTempF() and readObjectTempC()/readObjectTempF() functions.
void loop() {
	Serial.print("Ambient = "); Serial.print(mlx.readAmbientTempC());
	Serial.print("*C\tObject = "); Serial.print(mlx.readObjectTempC()); Serial.println("*C");
	Serial.print("Ambient = "); Serial.print(mlx.readAmbientTempF());
	Serial.print("*F\tObject = "); Serial.print(mlx.readObjectTempF()); Serial.println("*F");

	Serial.println();
	delay(500);
}